
Posted by scispectrum on 25th Jul 2026
How to Calibrate a Conductivity Meter: Step-by-Step Guide
How to Calibrate a Conductivity Meter: Step-by-Step Guide
I've walked into more than one QC lab where the conductivity meter was reading clean, stable numbers — right up until the day an auditor asked to see the calibration log and cell constant verification. Conductivity is one of those measurements people trust blindly because the display looks precise. It isn't, unless the probe's cell constant has been checked against a certified standard and the meter's temperature compensation is set correctly for what you're actually measuring. This guide walks through calibrating a conductivity meter properly — the same process I've used across pharma purified water systems and ETP effluent monitoring points — so your readings hold up whether you're releasing a batch or filing a CPCB compliance report.
Conductivity Meter Calibration: The process of adjusting a conductivity meter's readout against one or more certified KCl (potassium chloride) reference standards of known conductivity, so the instrument's cell constant and temperature compensation produce accurate, traceable results.
Why Conductivity Meter Calibration Matters
A conductivity probe doesn't measure conductivity directly — it measures the resistance between two electrodes and converts that to a conductivity value using the probe's cell constant (K). No electrode pair is manufactured to a perfectly exact K, and that constant also drifts slightly with electrode fouling, wear, and even storage conditions. Calibration is what tells the meter "here's the real relationship between what you're measuring and what the actual conductivity is."
For a conductivity meter used in pharmaceutical purified water testing, an uncalibrated cell constant that's off by even 2–3% can push a Stage 1 IP/USP conductivity result across the pass/fail limit without anyone realizing the instrument, not the water, is the problem. For ETP discharge monitoring, the same drift can mean reporting a false-pass on a CPCB compliance parameter.
Single-Point vs Multi-Point Calibration
Single-point calibration (one standard) is adequate for narrow-range applications — say, monitoring RO permeate that consistently reads in the 1–20 µS/cm range. Multi-point calibration (two or more standards bracketing your working range) is what NABL-accredited labs and most pharma SOPs require, because it verifies the meter's linearity across the range you actually use, not just accuracy at one point.
What You'll Need Before You Start
- Your conductivity meter with a clean, undamaged probe/cell
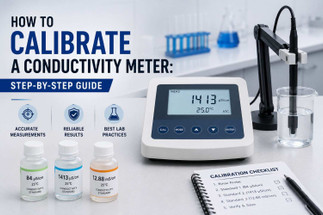
- NIST-traceable KCl calibration standards matching your working range (commonly 84 µS/cm, 1413 µS/cm, 12.88 mS/cm, or 111.8 mS/cm at 25°C)
- Deionized or distilled water for rinsing between standards
- Lint-free tissue or soft wipes
- A thermometer if your meter doesn't have built-in temperature sensing
- Calibration logbook or your LIMS/GLP data logging system
Step-by-Step Calibration Process
- Inspect and clean the probe. Rinse with deionized water and check for scale buildup, biofilm, or physical damage to the electrode surface. A fouled cell will never calibrate accurately no matter how good your standard is.
- Select the correct KCl standard(s) for your range. Match the standard's conductivity value to the range you actually test in daily — don't calibrate at 12.88 mS/cm if you're monitoring purified water at 2 µS/cm.
- Allow standard and probe to reach the same temperature. Conductivity is highly temperature-dependent (roughly 2% per °C for most aqueous solutions), so a mismatch between probe and standard temperature is one of the most common sources of calibration error.
- Immerse the probe fully, ensuring the electrode plates or ring sensors are completely submerged with no air bubbles trapped against the surface. Gently swirl or tap the probe underwater to release trapped air.
- Enter calibration mode on your meter and input the known value of the standard at the measured temperature (most standards come with a temperature-conductivity reference table).
- Allow the reading to stabilize before accepting the calibration point — most meters show a stability indicator; don't rush this step.
- Rinse thoroughly with deionized water between standards to avoid cross-contamination, especially when moving from a high-conductivity standard to a low one.
- Repeat for your second (and third) calibration point if doing multi-point calibration.
- Verify with an independent check standard — not one used in the calibration itself — to confirm the calibration is accurate before you start production testing.
- Log the calibration: date, time, standards used, cell constant/slope result, technician initials, and pass/fail against your acceptance criteria.
Temperature Compensation: Getting It Right
This is where I see the most confusion in the field. Most conductivity meters offer linear temperature compensation (a fixed %/°C correction, typically 2%/°C) as the default. That works reasonably well for simple salt solutions like KCl standards and most process waters. But natural waters, boiler water with variable mineral content, or ETP effluent with complex ionic composition don't always follow a linear correction curve accurately.
If you're monitoring cooling tower or boiler water where the temperature swings significantly between shifts, check whether your meter supports non-linear compensation profiles (sometimes labeled "natural water" mode). Using linear compensation on a non-linear matrix introduces a systematic error that gets worse the further the sample temperature is from 25°C reference.
Common Calibration Mistakes (And How to Avoid Them)
A few patterns show up again and again, whether I'm looking at a pharma QC lab's calibration log or an ETP operator's field notebook:
- Calibrating with an expired or contaminated standard. Always check the expiry date and store standards sealed, away from CO₂ exposure.
- Skipping the independent verification step. Calibrating and then immediately trusting the result without checking against a separate standard means you have no way of catching a bad calibration before it affects real samples.
- Ignoring cell constant drift over the probe's life. Conductivity cells wear, especially in high-ionic-strength or abrasive samples. If your calibration slope keeps drifting further from the nominal K value each time, it's telling you the probe is nearing end of life, not that your technique is wrong.
- Using the wrong calibration range for your application. A probe with cell constant K=1.0 calibrated only at high range will give poor resolution and accuracy in ultra-pure water applications where K=0.1 probes are the right choice.
- Not accounting for electrode polarization at very high conductivity. For samples above roughly 20 mS/cm, four-electrode or toroidal (inductive) conductivity cells resist polarization errors far better than simple two-electrode probes — worth reviewing your cell type if you're working with concentrated process streams or brine.
Conductivity Instruments at Scispectrum
Whether you're setting up a new QC bench or replacing a worn probe, here's where to look for the right instrument and calibration consumables.
Frequently Asked Questions
Conclusion
Conductivity calibration isn't a box-ticking exercise — it's the difference between a result you can defend in an audit and one that quietly drifts until someone questions it. Get the cell constant verified, get temperature compensation right for your sample matrix, and log every calibration properly.
Browse conductivity meters Call +91 7448882650