High-Conductivity Samples: Troubleshooting Range Limits, Polarisation and Carryover
SciSpectrum Lab Essentials
High-Conductivity Samples: Troubleshooting Range Limits, Polarisation and Carryover
A concentrated sample gives a reading lower than expected. The next dilute sample reads high. It is tempting to recalibrate immediately, but those two observations may involve different causes. The first question is what changed: the sample, the measurement range, the temperature or the handling sequence?
This guide helps industrial, water-testing and QC laboratories organise that investigation. “High conductivity” here means high relative to the intended method and measurement system; it is not a universal numerical threshold. The tables are review aids, not automatic diagnoses or replacement rules.
Start with the symptom, not a new calibration
Save the original reading or message with its unit, temperature and sample identity. Record whether the result was stable, drifting, capped at the display limit or replaced by an error. Keep the sample sequence: which solution was measured immediately before this one?
| Observed symptom | Check first | Avoid assuming |
|---|---|---|
| Over-range message or capped display | Exact warning, scale, probe range and temperature limits | That the screen gives a valid numerical result |
| Unexpectedly low result | Cell design, polarisation, deposits, bubbles and configuration | That the sample concentration must be low |
| Drifting or erratic reading | Temperature stability, immersion, wetting and sample condition | That waiting alone will fix every cause |
| Dilute sample high after a concentrated one | Rinsing, conditioning, vessel cleanliness and sample sequence | That carryover is already proven |
Our suggested troubleshooting approach is to change one justified item at a time and record the outcome. Several simultaneous changes may produce a plausible number while making the actual cause impossible to identify.

Check the whole system’s range and the units
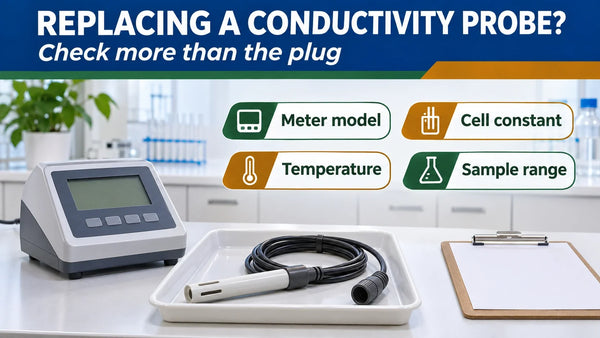
Compare the expected sample range with the exact meter and probe specifications. Check the selected measurement scale, cell setup and temperature conditions. A broad instrument display range does not mean that every compatible-looking sensor is suitable across it.
The Hanna HI6321 manual distinguishes “EC under/over range”, “EC out of calibration range” and temperature or compensation-range messages. These are separate warnings in that instrument. Use your own manual to interpret the actual message rather than treating every range warning as the same fault.
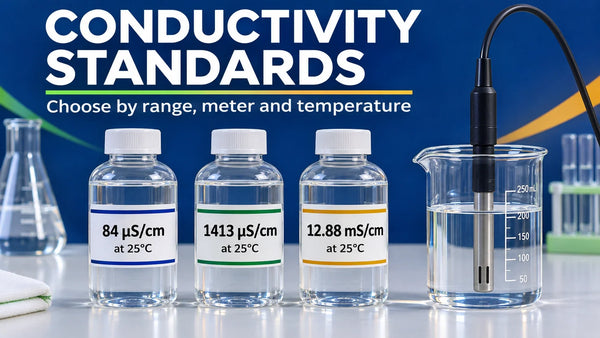
Confirm the unit before comparing a laboratory result with a process display. 1 mS/cm = 1000 µS/cm, so 20 mS/cm and 20,000 µS/cm express the same conductivity. A unit conversion is arithmetic; it does not extend the sensor’s measurement range.

If the documented range is exceeded, use the method’s out-of-range reporting route and obtain a suitable supported setup. Do not turn an over-range indication into an exact result by assigning it the last visible digit. For equipment context, see our conductivity meter guide.
Investigate an unexpectedly low result
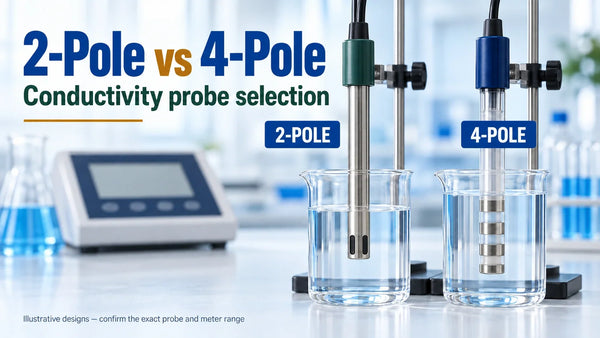
Hanna’s polarisation guidance explains that electrode effects in a two-electrode cell can produce falsely low conductivity readings. Its effect depends on the design and conditions. A stable-looking low reading therefore does not, by itself, establish that a concentrated sample has low ionic content.
Check the cell’s documented usable range and condition before attributing the result to polarisation. Retain the probe identity, nominal/correctly established cell factor, calibration record and relevant sample information. Record which check supports the suspected cause.
Four-electrode designs separate drive and sensing functions and can help in suitable broad-range applications. They still require a compatible meter and correct setup. A four-pole replacement is not a universal cure for deposits, bubbles, an incorrect temperature input or an unsuitable sample vessel.
If the application spans very different sample streams, prepare a range-coverage review rather than swapping sensors by trial and error. For the cell constant itself, see our cell-constant guide. Use the actual product specification to decide whether a change is justified.
Check temperature, immersion and vessel effects
The METTLER TOLEDO conductivity guide describes how bubbles, electrode coatings and interference from the sample vessel can alter measurements. Follow the exact probe instructions for required immersion, vent-hole coverage, sleeves and clearance. Do not apply one clearance distance to every sensor.
Temperature must also be compared on the same basis. Record the measured sample temperature, temperature source, compensation mode and reference temperature. A process display and bench meter may be showing different corrected or uncorrected quantities.
Hanna’s drifting-reading guidance includes probe cleanliness, connections, immersion, sample mixing and probe selection among the checks. Use mixing and bubble-removal actions appropriate to the probe and procedure. A temperature-stable display alone does not prove the cell is clean or correctly immersed.
| Question | Evidence to retain |
|---|---|
| What was the liquid temperature? | Actual temperature reading and source |
| Had the setup stabilised? | Time or stability evidence required by the SOP |
| Was compensation used? | Mode, reference temperature and applicable coefficient or algorithm |
| What is being compared? | Same unit and temperature basis for both reported values |
When sample composition or temperature changes significantly, review whether the selected correction is suitable. Avoid adopting a single generic coefficient for every concentrated solution. Retain the configuration before making a documented change.
Check carryover from one sample to the next
A film of concentrated liquid left on the probe or vessel can contaminate the next portion. HORIBA’s cell-care guidance explains rinsing between solutions to prevent cross-contamination and describes conditioning with a portion of the next solution. Apply the instructions for the particular cell and laboratory procedure.
Our proposed investigation sequence below uses separate fresh check portions to review a sequence-dependent problem. Agree the check material, conditions and acceptance rule under the SOP before interpreting the comparison. No numeric pass limit is supplied here.
- Initial check: measure a fresh approved check portion and retain its identity, result and temperature.
- High sample: measure the sample only within the documented system range. Record its position in the sequence.
- Rinse, clean or condition: follow the applicable procedure and keep used liquids separate from stock and fresh portions.
- Fresh check: use a new portion of the approved check material under comparable conditions, then review the result against the defined rule.

A changed check result shows a problem to investigate; it does not uniquely prove carryover. Check material condition, temperature, air exposure, contamination of containers and measurement repeatability may also matter. Very low-conductivity water is especially sensitive to its handling environment.
Where the method allows it, grouping similar sample ranges or measuring lower-conductivity samples before higher ones may reduce handling challenges. That sequence is a practical option to assess, not a substitute for demonstrated cleaning and verification. A dedicated suitable setup may be worth evaluating when streams differ substantially.
Do not prescribe a fixed rinse count or cleaning chemical for every probe. Some cells have delicate coatings or materials with specific restrictions. Follow the exact cleaning instructions and retain failed checks as well as successful repeats.
Why dilution is not an automatic range fix
The METTLER TOLEDO paper on common conductivity errors warns that dilution does not have a simple linear effect on conductivity. Conductivity depends on ion behaviour in the solution, not just the amount of dissolved material divided by the liquid volume.
Keep three different operations separate: converting µS/cm to mS/cm, applying a documented temperature correction, and changing sample concentration. Only the unit conversion is the simple factor of 1000 shown above.
If a method explicitly specifies dilution for a different measurand, such as a defined concentration determination, follow that method’s preparation, calibration and calculation. Do not relabel its output as the undiluted conductivity without supporting validation.
Keep a troubleshooting record that supports the next action
Use the worksheet below to make the investigation reviewable. Keep the original configuration and observation, the action taken and the check result together. Leave the decision blank until the reviewer has enough evidence.
| Record group | Information to retain |
|---|---|
| Sample and sequence | Sample ID, stream, previous sample and order |
| Observed symptom | Exact result/message, units and stability behaviour |
| System identity | Meter, probe, cable and relevant revision |
| Range and configuration | Selected scale, supported range and cell setup |
| Temperature basis | Measured temperature, source, mode and reference |
| Physical setup | Vessel, immersion, vent holes, sleeve and clearance |
| Standard/check identity | Value, lot, expiry and applicable temperature data |
| Handling and cleaning | Rinse/conditioning steps and fresh portion identities |
| Before/after evidence | Original check, action and repeat check results |
| Decision and scope | SOP criterion, affected results, reviewer and next action |
If the fault remains unresolved, send a concise evidence pack to technical support or the supplier. Include the exact symptom, sample range, temperature, meter/probe identities, settings, standard details and observations before and after the action. A photograph of the display is useful when the full unit and warning are visible.
Keep affected results under the laboratory’s review procedure until suitability is established. For calibration context, use our conductivity calibration guide with the actual instrument manual. This article sets no universal calibration interval, acceptance tolerance or release criterion.
Frequently asked questions
Can polarisation make a concentrated sample read low?
Does a four-pole probe solve every high-conductivity problem?
Why does a dilute sample read high after a concentrated sample?
Can I multiply a diluted conductivity reading by the dilution factor?
Are 20 mS/cm and 20,000 µS/cm the same?
Should every unexpected reading trigger recalibration?
Specify the sample range and the symptom
SciSpectrum Lab Essentials is a reseller of laboratory instruments and accessories. Send your meter and probe models, sample range with units, temperature conditions and exact observed problem. Include the required sample volume and setup so any proposed probe or instrument configuration can be checked against the application.
Request a conductivity setup reviewBrowse electrodes and probesManufacturer references
- Hanna Instruments: What is the polarisation effect?
- Hanna Instruments: Drifting or erratic EC readings
- HORIBA: Conductivity Cell Care and Maintenance Procedures
- METTLER TOLEDO: Reducing Common Errors in Conductivity Measurements
- METTLER TOLEDO: A Guide to Conductivity Measurement, sections 2.6–2.7 and 3
- Hanna Instruments HI6321 manual: Measurement settings and error messages