How to Clean a pH Electrode After Protein, Oil and Wastewater Samples
SciSpectrum Lab Essentials
How to Clean a pH Electrode After Protein, Oil and Wastewater Samples
A pH electrode that responds slowly after milk, oily process water or an ETP sample may need more than a water rinse. Deposits can remain on the sensing glass or reference junction and interfere with the next measurement. Cleaning is worth evaluating before ordering a replacement, provided the electrode is undamaged and its manufacturer allows the proposed treatment.
The important choice is the cleaner for the actual residue. There is no single soaking time or cleaning solution that suits every probe. This guide helps laboratory teams select a documented cleaning route and decide whether the electrode is ready to return to service.
Rinsing, cleaning and conditioning are different
Rinsing removes loose sample and reduces carryover. Cleaning targets an adherent deposit with an appropriate treatment. Conditioning or rehydration prepares the sensing surface after cleaning or drying, using the solution specified for the electrode. Calibration comes after these preparation steps.
Hanna’s cleaning guidance notes that deposits can remain even after a distilled- or deionised-water rinse. Do not rub the sensing bulb with a cloth or tissue to remove a coating; use the prescribed chemical cleaning procedure.

Choose the cleaner by the residue
| Sample or deposit | Cleaning route to check | What to confirm |
|---|---|---|
| Milk, protein solutions or biological samples | Protein-specific electrode cleaner | Compatibility, contact time and conditioning instructions |
| Oil, grease or fatty residues | Oil-and-fat electrode cleaner or another explicitly approved treatment | Body, seal and junction compatibility |
| Wastewater with mixed solids and organic matter | General or targeted cleaning selected from the known contamination | Whether deposits are external or the reference system needs maintenance |
| Mineral precipitate or a suspect blocked junction | The specified inorganic or junction-cleaning treatment | Deposit identity and the exact electrode procedure |
METTLER TOLEDO’s sensor troubleshooting guidance separates treatments for protein, lipophilic deposits and junction contamination. Use that distinction to identify the problem; apply the procedure approved for your own sensor rather than copying a chemical recipe from another model.

Cleaning after protein-rich samples
For milk, food extracts or protein-containing laboratory samples, check whether a protein-specific cleaner is recommended. Hanna describes HI7073L as an enzymatic cleaner designed for protein-coated pH electrodes. It also warns that an electrode can read correctly in a buffer yet still give inaccurate sample results when it is dirty.
Hanna’s general maintenance example specifies at least 15 minutes in its protein cleaner, followed by a rinse and at least one hour in its storage solution. Treat these as instructions for that documented cleaning system, subject to the electrode manual; do not apply the timing to every brand.
For a shared dairy or food laboratory, record the sample type in the cleaning log. “Electrode rinsed” does not establish that a protein film was removed. Keep routine rinse water, cleaning solution and calibration buffers in separate, labelled containers.
Cleaning after oil and grease
An oily film calls for a treatment intended to remove oil or fat. Hanna lists HI7077L specifically for this purpose. Choosing that cleaner category does not by itself confirm compatibility with a different manufacturer’s probe.
Check the electrode instructions before using alcohol, acetone or another solvent. Some manufacturers describe solvent treatments for particular sensors; that does not establish compatibility with every body material, seal or cable assembly. Use the specified product, concentration and contact time.
Rinse away the cleaning solution before conditioning or calibration. If a visible film persists, return to the approved troubleshooting procedure rather than extending the soak indefinitely. Record what was tried so the next operator does not repeat an ineffective treatment without review.
Cleaning after wastewater and ETP samples
“Wastewater” describes the sample source, not one contaminant. A dairy effluent, oily process stream and relatively clear treated effluent may leave different residues. Use the sample history and inspection to decide whether the probe needs general cleaning, an oil treatment, a protein treatment or investigation of its reference junction.
The Thermo Scientific pH in wastewater guide describes a warm, not hot, 1% laboratory-detergent treatment for the electrodes covered by that guide, with thorough rinsing and appropriate refillable-electrode maintenance. It also directs users to the electrode manual. This is a documented example, not a universal detergent recipe.
For ETP and environmental-laboratory work, separate the cleaning SOP from the measurement method. BIS references IS 3025 (Part 11) for pH testing in its packaged drinking-water product manual; that reference does not prescribe one cleaning solution for all electrodes or replace your method’s quality-control requirements.
The complete cleaning-to-verification workflow

1. Inspect and record the starting condition
Record the electrode model, last sample and symptoms: slow stabilisation, visible coating, drift or failed calibration. Inspect the bulb, shaft and cable. A crack or damaged cable needs assessment before further use; a longer soak is not a repair.
2. Use a fresh portion of the correct cleaner
Pour enough cleaner into a suitable vessel to cover the sensing bulb and junction as instructed. Support the electrode so the tip does not strike the vessel. Follow the product label, electrode manual and laboratory chemical-handling procedure. Do not return used cleaning solution to its bottle.
3. Follow the specified time, then rinse
Use a timer and rinse thoroughly after treatment. For comparison, the Thermo Scientific pH Measurement Handbook gives a 5–10 minute cleaning step and at least 30 minutes of subsequent storage-solution conditioning in its described procedure. These timings differ from Hanna’s example because the cleaning systems and procedures differ.
4. Maintain the reference system where applicable
The same Thermo handbook includes replacement of filling solution for refillable electrodes during its cleaning procedure. Follow the manual for the correct electrolyte and method. Do not attempt to refill a sealed gel-filled electrode, or use storage solution as an assumed substitute for filling solution.
5. Condition before calibration
Place the sensing end in the recommended conditioning or storage solution for the specified time. Thermo Fisher’s basic electrode-care guidance treats storage and refillable-electrode maintenance as routine care. Cleaning solution is a treatment liquid, not the default overnight storage liquid.
6. Recalibrate and verify
Use fresh buffer portions, the correct buffer set and the calibration points required by your method. Let readings stabilise and account for temperature according to the meter instructions. Hanna’s calibration guidance covers electrode preparation and the sequence of rinsing, immersion and stabilisation.
Review the calibration slope and offset against the meter manual and your SOP. Then run the verification buffer or control required by your laboratory. Where sample behaviour was the problem, include an appropriate sample-matrix check under the approved method. A clean-looking probe alone is not evidence that measurement performance has recovered.
For the calibration sequence, use our step-by-step pH calibration guide. For persistent drift, see common pH measurement errors.

When cleaning is not enough
Stop treating the problem as routine fouling when the electrode is visibly damaged, cannot meet your acceptance criteria after the approved maintenance procedure, or repeatedly fails in the intended sample. Check fresh buffers, temperature settings and meter connections before concluding that the electrode is the only cause.
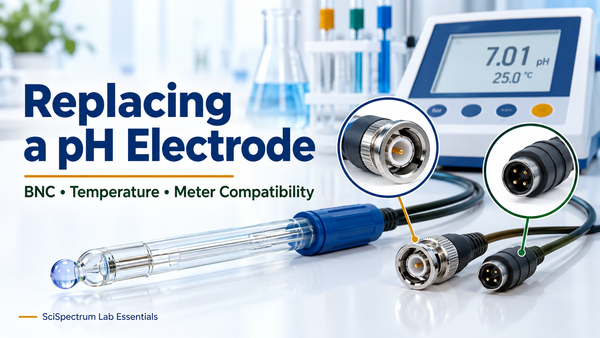
If replacement is needed, confirm both the pH and temperature interfaces. Our BNC, temperature-connector and meter-compatibility checklist helps you prepare the replacement enquiry. Cleaning a damaged probe or choosing a replacement by connector appearance alone does not resolve the underlying problem.
A practical electrode-cleaning checklist
- Electrode model and last sample recorded
- Cleaner and treatment confirmed against the manual
- Bulb, junction and cable inspected
- Cleaning time and rinse completed
- Correct filling solution used where required
- Conditioning completed in the specified solution
- Calibration and verification accepted under the SOP
- Outcome, date and operator recorded
A useful log entry records the cleaner name and lot, contact time, conditioning solution, calibration results, verification result and final decision. This helps distinguish recurring sample fouling from a one-off handling problem without relying on memory between shifts.
Frequently asked questions
Can I clean a pH electrode with distilled water only?
How long should I soak the electrode in cleaning solution?
Can I use the same cleaner for protein and oil?
Should I calibrate after cleaning?
Can cleaning recover every slow electrode?
Choose cleaning supplies for your electrode
SciSpectrum Lab Essentials is a reseller of laboratory instruments and accessories. Send your electrode model, meter model, sample type and current symptoms when requesting cleaning supplies or a replacement. Include the cleaner recommended in your manual, if known, so the enquiry can be checked against your requirement.
Request cleaning suppliesBrowse electrodes and probesManufacturer references
- Hanna Instruments: How do I clean my pH electrode?
- Hanna Instruments: HI7073L protein cleaning solution
- Hanna Instruments: HI7077L oil-and-fat cleaning solution
- Thermo Scientific: pH Measurement Handbook, electrode cleaning procedures
- Thermo Scientific: pH in wastewater user guide
- METTLER TOLEDO: pH sensor troubleshooting
- Hanna Instruments: Electrode calibration guidance
- Thermo Fisher Scientific: Basic electrode care
- BIS: Product manual referencing IS 3025 (Part 11)