How to Calibrate a TDS Meter and Check Its Conversion Factor
SciSpectrum Lab Essentials
How to Calibrate a TDS Meter and Check Its Conversion Factor
Suppose two meters on the same water both show 800 µS/cm, but one reports 400 ppm and the other 560 ppm. Before opening a calibration sachet, check their TDS factors. A factor of 0.50 gives the first number. A factor of 0.70 gives the second. Those readings alone give you no reason to adjust either conductivity cell.
Most handheld TDS meters estimate dissolved solids from conductivity. To get a result you can use, check three things separately. Calibrate the measurement using the procedure for your model, verify the result with a fresh check portion, and establish whether the conversion is suitable for the water you are testing.
Choose the calibration route for your meter
Start with the model number and the manual’s calibration section. A ppm display tells you what the meter reports. The manual tells you which standard it accepts and which mode to select.
| Meter | Calibration route | What to check |
|---|---|---|
| Hanna HI98301 DiST 1 | One-point calibration with the specified 1382 ppm TDS standard. | The stated conversion factor is fixed at 0.50. Hanna HI98301 specifications and calibration |
| Hanna HI6321 | Calibrate conductivity and review the TDS reading settings. | The manual lists a TDS factor setting from 0.40 to 1.00. Hanna HI6321 manual, sections 9.2 and 10 |
| Eutech CON 700 | The manual covers conductivity calibration and manual calibration in TDS mode. | Confirm the selected mode, range and standard. Eutech CON 700 manual, sections 4, 6.7 and 7 |

Read the standard label before opening the bottle
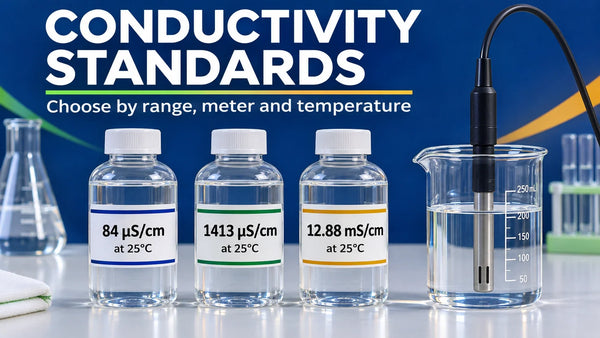
A bottle labelled 1413 µS/cm and one labelled 1382 ppm carry different assigned quantities. Even when a supplier lists both EC and TDS values for a solution, confirm which value applies to your meter’s calibration mode and scale. For example, the Hanna HI98301 automatically recognises its specified 1382 ppm standard. The 1413 µS/cm label alone gives you no basis for substituting that solution. Hanna HI98301 specifications and calibration
For a meter calibrated in EC mode, use an approved conductivity standard suitable for the working range. Check the value, unit, reference temperature, lot and expiry. For direct TDS calibration, check the manufacturer’s specified TDS standard and scale. Where the manual offers automatic and manual modes, use the mode appropriate to the actual standard. Check how the instrument handles the solution’s temperature before accepting the point. Eutech CON 700 manual, sections 4, 6.7 and 7
For EC point selection, see our guide to choosing a conductivity calibration standard.
Calibrate and verify at the bench
- Record the starting setup. Save the current calibration and factor, the reading mode and the temperature settings. Take the as-found reading if your procedure requires it.
- Prepare a clean working portion. Inspect the cell and follow the specified rinsing and conditioning procedure. Use a fresh portion of standard in a clean vessel. Seat the probe at the specified depth and check for trapped bubbles. Hanna HI6321 manual, sections 9.2 and 10
- Calibrate in the supported mode. Let the reading and temperature stabilise as instructed. Confirm the recognised or entered standard value before saving. Use the points and ranges required for the intended work.
- Return to measurement mode and verify. Use a fresh portion of the check material required by your procedure. Record its assigned value and temperature basis, the observed result and the applicable limit. Where the method calls for an independent check standard, use it.
If a check fails, keep the failed reading. Verify the unit, standard identity, temperature and probe setup before changing a setting. This preserves the evidence needed to tell a preparation error from an instrument problem.
Check whether the display uses the intended factor
On a meter that displays both EC and calculated TDS, take both readings from the same stable check portion. Confirm that the EC value is on the temperature basis used by the TDS calculation. If the EC display uses mS/cm, convert it to µS/cm before applying the factor. On the HI6321, the manual describes the calculation using conductivity referenced to 25°C. Check your model and settings for the applicable basis. Hanna HI6321 manual, sections 9.2 and 10
Expected TDS display ≈ EC in µS/cm × configured factor

If the two displays disagree with the calculation beyond what resolution and rounding explain, check for a different factor, temperature basis, automatic range or a ppm-to-ppt switch. For a fixed-factor TDS-only tester, use its documented factor and approved check solution. An EC reading from another meter is comparable only after you check its calibration, units and temperature basis.
Check whether the factor fits your water
The display can calculate correctly and still give a poor estimate for a different water stream. A factor established for RO permeate may perform differently on feed water or a blended stream. The relationship changes with dissolved composition. METTLER TOLEDO describes deriving a factor from a known TDS value or a gravimetric result and its paired conductivity reading. METTLER TOLEDO conductivity guide, section 3.6.1
Suppose a representative sample gives 800 µS/cm on the required reference-temperature basis and an independent gravimetric result of 480 mg/L. The observed ratio is 480 ÷ 800 = 0.60 on that basis. This is an illustrative calculation. For routine use, compare representative samples over the intended range and apply the method’s acceptance criteria before adopting the factor. If the ratio shifts across streams, keep the streams separate in your assessment.

For trend monitoring on a consistent stream, an agreed factor makes comparisons easier to interpret. When the required result is gravimetric TDS, use the prescribed laboratory method. For example, EPA Method 160.1 determines the residue in a filtered sample by drying and weighing. The ppm number on a conductivity-based tester comes from a different measurement process. US EPA method 160.1, filterable residue by drying
Record the reported unit as the instrument or method defines it. A meter may label its calculated dilute-water result as ppm or mg/L. In general, mass fraction in ppm and mass concentration in mg/L are different quantities. Keep the documented scale with the result when comparing reports.
Keep enough detail to reproduce the check
Record the meter and probe, calibration mode, standard lot, temperature basis and factor. Keep the expected and observed check values with the result. If you compare against a laboratory reference, record the paired sample ID and the reference method. A log entry that says “calibrated OK” leaves the next analyst without enough information to explain a change in ppm.
| Record field | Evidence to keep |
|---|---|
| Instrument and mode | Model, probe, EC or TDS mode, range and units |
| As-found setup | Previous calibration, factor, temperature basis and reading if required |
| Calibration standard | Assigned value, unit, scale, lot, expiry and reference temperature |
| Calibration action | Points, measured temperature, date and operator |
| Verification material | Check ID, assigned value, temperature and acceptance limit |
| Verification result | Observed reading, difference, decision and follow-up |
| Conversion check | Paired EC/TDS values, factor, expected display and resolution |
| Sample comparison | Sample ID, independent result, method, observed ratio and reviewer |
Questions from the bench
Can I use a 1413 µS/cm solution in TDS calibration mode?
Should I set the factor to 0.50 or 0.70?
Why do two calibrated meters give different ppm readings?
Do I need to recalibrate when I change the TDS factor?
Match the meter and standard to your water
SciSpectrum Lab Essentials is a reseller of laboratory instruments and accessories. Send the meter model, the standard you currently use, your expected conductivity range and whether you report EC or estimated TDS.
Request a meter and standard matchTechnical references
- Hanna HI98301 specifications and calibration
- Hanna HI6321 manual, sections 9.2 and 10
- Eutech CON 700 manual, sections 4, 6.7 and 7
- METTLER TOLEDO conductivity guide, section 3.6.1
- US EPA method 160.1, filterable residue by drying